Sometimes the adventurers are heading down a long, dark (somewhat boring) corridor and you want to give them some details to spice it up (and increase their unease and paranoia!)
Here's a quick table that I put together for just that purpose. Roll a d10 to select a random element. Most of them have another d6 subtable built in for more random goodness. :)
If anyone is inspired by the list and would like to add additional ideas in the comments, I'll collect everyone's ideas and turn them into a PDF file for download.
1 - Strange chalk markings are scratched on the walls and floor (d6: 1 - measurements; 2 - message; 3 - wizard marks; 4 - mystical runes; 5 - warning; 6 - gibberish)
2 - Footprints (d6: 1 - boots, 2 - reptilian, 3 - feline, 4 - lupine, 5 - ursine, 6 - strange) lead away from the party and are just barely visible in the dust.
3 - The floor stones are loose and wiggle when stepped upon.
4 - Periodically, steam rises up from cracks in the floor.
5 - The floor is covered with a few inches of water. (d6: 1 - it bubbles; 2 - it smells foul; 3 - its warm; 4 - its uncomfortably hot; 5 - it is icy cold; 6 - it is acidic and begins to dissolve footwear)
6 - Dozens of spikes are driven into the walls and remnants of rope are attached to some.
7 - The walls are carved in bas relief (d6: 1 - mouths; 2 - eyes; 3 - snakes; 4 - geometric patterns; 5 - abstract humanoids; 6 - tentacled horrors)
8 - The walls are covered in murals of (d6: 1 - a battle; 2 - a ritual; 3 - a pleasant scene; 4 - an abstract scene; 5 - a godly visage; 6 - a dark visage) that are in (d4: 1 - well maintained; 2 - aged but well preserved; 3 - ruined; 4 - barely understandable) condition.
9 - A trap (d6: 1 - blades; 2 - falling blocks; 3 - moving walls; 4 - pits; 5 - spears; 6 - chute/slide) has been triggered and has not been reset. It may have victims...
10 - The walls and floor (d6: 1 - change material; 2 - are oddly unfinished; 3 - are covered in blood; 4 - appear to be made of flesh; 5 - arc with energy; 6 - are vibrating).

Showing posts sorted by relevance for query walls. Sort by date Show all posts
Showing posts sorted by relevance for query walls. Sort by date Show all posts
Thursday, December 30, 2010

Sunday, June 5, 2011
Mapping with Jenga Blocks
In my CotMA game, I use minis. I make no bones about the fact that I like them.
I also like battlemats and dungeon tiles. The problem with the battlemats and dungeon tiles are the SQUARES. It's very easy to get hung up on the 5' squares. I'm sure we can get past it, but in the interest of trying something out, we skipped the squares and used Jenga blocks for the dungeon walls in our most recent adventure.
I've posted about making my own battlemats before. I have a "battlemat" that I used years ago when I ran a FATE game. Combat is very abstract in FATE, but I still wanted some kind of representation. Basically, my FATE battlemat is a large piece of white vinyl with no markings. You can write on it with wet erase markers, but there are no squares or hexes. I put this down in case we needed to draw something and to protect the table from all the rolling dice.
It turns out that there are some advantages to using Jenga blocks for mapping.
- First, each block is about 10' in scale. That makes scaling the map easy.
- Second, you can just rearrange the blocks AROUND THE MINIS! This was kind of a revelation. When you use a battlemat with drawn walls/rooms, you have to move the minis off the map, spray it with water, wipe it down and then move them all back. When you use Jenga blocks, you just move the walls. The minis stay put. You can then just adjust the placement of the minis to restore the marching order, etc.
- Of course, the Jenga blocks can't form just any shape. You can't easily make a cavern with the detail you could draw with a marker. I don't think that's necessarily a bad thing, the battlemat and minis are supposed to be an abstraction of the reality of the fantasy environment. (Did I just blow your mind there?) I actually like the "chunky" nature of how the walls fit together.
Overall, the reception to the Jenga blocks was positive at the end. I think we'll keep using them for awhile and see how their use holds up over time.
Here are a couple of "re-created" pics to show how the blocks look in play.

The rogue has found a pivoting secret door that opened to reveal a dark altar...


Also, in the TV series, FREAKS AND GEEKS, the characters play a game of Dungeons and Dragons. You can plainly see in these screencaps that the DM is using dominoes to represent the dungeon. I hear that this was common back in the day, but we never did it. Dominoes might be a little easy to tip over in use, but maybe not.


Here's the segment of the episode that includes the adventure. Enjoy!
Friday, December 10, 2010
Q1 - The Evil Temple of Fraz-Urb'luu (Part 4)

The Trap Rooms:
I actually broke out the key for this level into two parts. 1-1 to 1-5b were all "Temple Level", now we have "The Trap Rooms".
I'll label those TR-1, etc.
I remember when I was creating this dungeon, I was thinking, "How do the bad guys get past all these traps and illusions?" I think I succeeded in making each trap 'realistic', in that if you know that it's there, or you snoop around, you can figure a way around them.
TR-1 "In the center of the room is a pressure plate, which if stepped on causes a large block to fall from the ceiling. Save vs. Pet. or take 2-16 pts of damage. (Solution -- don't walk in the center of the room)
TR-2 "This room has walls which are very sticky and cause anything they touch to stick to them. (really, I don't think the walls are in the habit of touching things; I think that things come into contact with the walls...) This bond can be broken by strength, but the character will take 1-6 points of damage from his skin ripping off. The bond can also be dissolved by alcohol a strong solvent (?). There is a +1 longsword which hums in the presence of orcs stuck to the southeast wall. Anyone trying to take the sword has a 1-3 on 6 chance of touching the wall and becoming stuck. If the sword is forced off the wall it will break.I seem to remember that the NPC, Brash Blunderbuss, managed to get the sword off the wall. I don't remember if I did that to showcase the sticky walls or if the other players somehow suggested that Brash go after the sword.

the light beams in TR-3
TR-3 "There are beams of light alternating like steps (see above) in the center of the room. They can be considered to be two things: 1- LIGHT STEPS: they can be walked across if desired. This will accrue no damage or harm. 2- TRIP BEAMS for a trap: if this is thought of or inferred then the person who breaks the beam will take 1-2 pts of damage per beam.This room shows my early development as a DM. I was planning for player input and perception. If the players thought that the beams were a trap -- they were a trap. If they thought they looked like "light steps" -- then, they were harmless light steps. I believe the players thought the beams were a trap. They used a mirror or something to deflect the beams and avoid damage.
I'm actually quite proud of the following trap. I enjoyed DMing it back in the day.
TR-4 "The Ascending/Descending Stair: This staircase is set up on a counter weight system that allows the priests to raise and lower the steps to the dungeon level with little effort. The steps are currently down. The stairs counter-weight has gone slightly bad, in that if you walk along the outside along the railing, the stairs slowly crank upwards. By the time the party has reached the bottom of the stairs in this manner, it will be a 20' drop to the floor. This defect has been reinforced by an illusion that the stairs are still down. The twisting and spiral nature make this ascent of the stairs almost impossible to detect (a 5% chance for someone who thinks something's wrong). This effect is easily avoided if the characters walk toward the inside of the stairs. The ceiling is 40' high. The fall does 2-12 pts. of damage.I remember the lead character taking a tumble at the end. "That last step is a doozy!" Of course the other problem is that you are now 20' below the bottom stair in a dark dungeon. Good stuff.
Tuesday, August 30, 2011
DIY Dungeon Walls
Back in 1987, I purchased a copy of Game's Workshop's Warhammer 40,000. This was my first big foray into the miniatures world.
Sure, I had some D&D minis that we mostly used for marching order, but when you need to build an army -- you paint a lot of minis...
...and you paint a lot of terrain.
The original WH40k book encouraged you to build your own terrain (and even vehicles!) Here are some pics from that book that show you how I caught the mini/terrain bug...


Bottom line, once you start building terrain for your WH40k army, you never look at a plastic cup, margarine tub, or toilet paper tube the same way again!
In fact, McDonalds drink holders are PERFECT for a set of four linked pillboxes. You just flip it over and paint it... Here... see for yourself...
 |
| It even has "T" shaped slots that orks and space marines can stick their bolters out of and stay in cover!!! |
You see, I work in the Tech Services department and this year we bought about 300 new HP laptops for our schools. Each of those laptops has two sturdy foam "bumpers" that protect it during shipping.
Each of those laptops was removed from its box and the cardboard was recycled. The foam "bumpers" were put into trash bags and that is where I stumbled upon them. FIVE bags of them.

Well, the first thing I think of is, "what can I do with these?" Certainly there is something... Let's have a closer look... Rough texture, layers, lightweight... I have an idea.
Here are some pictures of what I decided to do...
 |
| these are the foam bumpers |
 |
| you can tear the end parts off with your hands |
 |
| this is a LOW TEMP glue gun; the high temp one melted the plastic. I also bought some gray acrylic paint ($0.39 each) and a bag of plastic skulls (it's almost Halloween!) |
 |
| glue them together two high |
 |
| this is what they look like from the top. You can see that I made a knife out of a razor blade and some tape... |
 |
| it's long enough to cut through in one slice... |
You can see that there are a couple of different places you can cut these. You can make long straight walls; C shaped sections; L shaped sections; etc. I might even make some claustrophobic narrow dead ends...
Here are the pieces that I cut out. You can reuse some of the tops you tore off to make some pillars too!

Here are the first three pieces I've done. I haven't experimented with spray paint (it's really hot here in AZ right now and I've no good place to spray at the moment...) but that might be a real time saver.
Of course, I plan to do some architectural elements (like those skulls) and I might paint some graffiti or runes on some walls. Some green slime here and there would be a nice touch too...


The pictures really don't do the walls much justice. They do look pretty good.
Special bonus: you can buy little plastic champagne glasses at craft stores. They are PERFECT to use as flying bases. (see the wizard in the first pic!)
Thursday, October 6, 2011
3D Dungeon Walls from Foam (Part 1)
Those of you who have followed this blog for awhile, know that I LOVES my minis. I love the prepainted kind (got lots of those). I love painting my own (when I have time). I love finding toys that can substitute for minis. I love making minis from scratch.
Well, a few weeks ago, I posted about making dungeon walls from foam. The pics aren't very good in that post.
Here's part one of how I'm making articulated dungeon walls from foam, toothpicks and O-rings.
Enjoy!
Well, a few weeks ago, I posted about making dungeon walls from foam. The pics aren't very good in that post.
Here's part one of how I'm making articulated dungeon walls from foam, toothpicks and O-rings.
Enjoy!
Saturday, January 4, 2014
Cavern Geomorphs (one set finished)
Previous posts here and here.
So, I abandoned the square cavern geomorphs. My tests just didn't work out. Over on the DM's Craft board, a person named @onethatwas suggested hexes.
This idea worked better. I had a few quality control issues making sure that the hexes were exactly the same size, but they'll work fine.
Here are some pics --


At this scale, they will integrate with my Dwarven Forge Game Tiles, so we'll see how that goes.
So, I abandoned the square cavern geomorphs. My tests just didn't work out. Over on the DM's Craft board, a person named @onethatwas suggested hexes.
This idea worked better. I had a few quality control issues making sure that the hexes were exactly the same size, but they'll work fine.
Here are some pics --
The hexes are double-thick cardboard and the walls are a single layer. The "door" gap is 2" and the hexes are 10" across. I spray-painted them black and then I drybrushed the edges with grey. I also used a sponge to highlight the "walls." In some spots (you can see it on the tile above) I used the sponge to make slime/mold/fungus on the tiles. Just for visual interest.
At this scale, they will integrate with my Dwarven Forge Game Tiles, so we'll see how that goes.
Wednesday, June 1, 2011
Underground Adventure
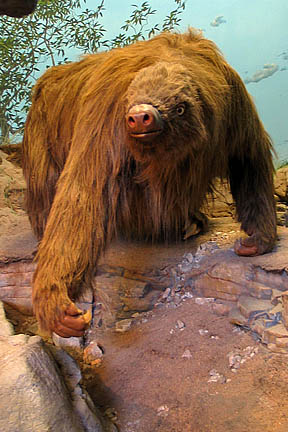
This past weekend, my wife, some friends and I all drove to southern Arizona to visit Kartchner Caverns and the Copper Queen Mine. It was very interesting being underground in these two locations. It felt a little like a dungeon adventure!
Some comparison/contrast observations:
One key idea -- without light you are doomed!!!
Here are some pics I found online of the two places. Enjoy!
KARTCHNER CAVERNS


THE COPPER QUEEN MINE


Some comparison/contrast observations:
| Cavern | Mine |
| Walls are smooth, natural in appearance | Walls are rough, chunky, evidence of tools used |
| Wet, dripping water, mud, pools of water | Dry, dusty |
| Warm, humid (80°F+) | Cold, dry (47°F) |
| Flowstone, stalactites, stalagmites, soda straws | Wooden supports, metal bolts, tools |
| Bats, guano, crickets, ground sloth | Evidence of human(oid) activity |
One key idea -- without light you are doomed!!!
Here are some pics I found online of the two places. Enjoy!
KARTCHNER CAVERNS


THE COPPER QUEEN MINE


Sunday, December 12, 2010
Q1 - The Evil Temple of Fraz-Urb'luu (Part 6)
Level 2: Security
 This level is guard heavy. All evil human cultist guards. There's also a special faction called "The Red Guards" that is elite and protects Kraalnar exclusively.
In 1993, I ran a Fantasy Hero version of this adventure at Hexacon 3. I built a 3D dungeon board for this event. You can see pics of the board here. I also created the "Wall Crawlers" in 3D.
I changed the "Wall Crawlers" to be a kind of tentacle. I created 3D walls with purple and blue dots and I put them on either side of the corridor. I used pushpins and Sculpey to create some tentacles and when the PCs triggered the trap, I stuck the tentacles in the foam walls. It was great! Pins and foamcore were the perfect way to set up a "transforming" room trap. Now you see one thing; now its different. Here are some pics. I would have set up the corridor, but the 3D board is in storage. :(

2-1 "Three guards wait here for the party. They won't be covered by missile fire until all but one is dead. The missile fire will come from 2-2. These guards have low hp; 5 max.I rolled the hp up at the time. 1d8 per guard. Rolls over 5 became 5. It's apparent that I tried to add a little variety to battles by putting in a contingency (missile fire after all but one are dead). Good stuff.
2-2 "Two guards will hold off the party by firing arrows down the corridor until they can maneuver the ballista into place (rate 1/3 damage 1-10). It is loaded. If hard pressed, they will fall back and rely on the wall crawlers (2-3) as defense. One guard has an arrow of giant slaying and three arrows +2.I remember Sharky carrying that arrow of giant slaying around in his quiver for quite awhile until he needed it in the Citadel of Urk (stay tuned). I can't remember if the guards used the arrows +2 in their own attacks. They probably didn't; they are treasure after all. :)
2-3 "Wall Crawlers: These creatures are AC 0, have 8 hps, and their holes are too small to permit attacks internally. They have a keen sense of hearing and smell. When they hear creatures approach, they sniff the air to see if they can smell "herb pouches". If so, the crawlers will not attack. Otherwise, they will attack as 2 HD creatures with +2 to hit and do 1-3 pts of damage."Although I do not note the "herb packets" on any of the antagonists in this adventure, some guards were in possession of the packets to facilitate their movement past the crawlers. The PCs found the packets and wrote them off as some kind of "tobacco chew". They never made the connection.
In 1993, I ran a Fantasy Hero version of this adventure at Hexacon 3. I built a 3D dungeon board for this event. You can see pics of the board here. I also created the "Wall Crawlers" in 3D.
I changed the "Wall Crawlers" to be a kind of tentacle. I created 3D walls with purple and blue dots and I put them on either side of the corridor. I used pushpins and Sculpey to create some tentacles and when the PCs triggered the trap, I stuck the tentacles in the foam walls. It was great! Pins and foamcore were the perfect way to set up a "transforming" room trap. Now you see one thing; now its different. Here are some pics. I would have set up the corridor, but the 3D board is in storage. :(
 |
| Here's a pushpin tentacle made of sculpey |
 |
| Here's the wall section before the tentacles appear... |
 |
| ...and here's the wall section after. Nasty! |
2-4 "Guard Barracks: Three more guards in chain mail await here. They have 11 and 12 hps and wield bastard swords. There is a total of 10 bunks. The other three guards are on routine patrol."I didn't have a wandering monster chart for this adventure. I did use these three guards as an encounter when things were going a bit slow. I think the PCs encountered them in the dungeon...
Friday, October 7, 2011
3D Dungeon Walls from Foam (Part 3)
The exciting conclusion!!
If you have any questions, leave a comment. Enjoy making your walls!
If you have any questions, leave a comment. Enjoy making your walls!
Friday, December 6, 2013
Cavern Geomorph Project
Previous post here.
OK, the project is progressing--
Here's a "tool" that I made so I can quickly measure the gaps for the hallways. I made a 2" and 1" space. You can place the gap across the gridlines and draw little tick marks. Then you can freehand the walls on the tile. I also made a 4" rule with a 1/4" tick mark for quick use.

Here are a few tiles drawn in -- I want to try a proof of concept before I finish the whole thing. No sense in wasting time.

I used strips of black foam for the walls. They are flexible and irregularly shaped. It's kind of an eggcarton foam that I get from work (electronics packaging.)

Now I've covered the foam and tiles with TP using a glue/water mix. About 50/50.

Gonna let it dry. Then I will cut out the tiles and spray paint them black.
We'll see how it goes!
OK, the project is progressing--
Here's a "tool" that I made so I can quickly measure the gaps for the hallways. I made a 2" and 1" space. You can place the gap across the gridlines and draw little tick marks. Then you can freehand the walls on the tile. I also made a 4" rule with a 1/4" tick mark for quick use.
Here are a few tiles drawn in -- I want to try a proof of concept before I finish the whole thing. No sense in wasting time.
I used strips of black foam for the walls. They are flexible and irregularly shaped. It's kind of an eggcarton foam that I get from work (electronics packaging.)
Now I've covered the foam and tiles with TP using a glue/water mix. About 50/50.
Gonna let it dry. Then I will cut out the tiles and spray paint them black.
We'll see how it goes!
Subscribe to:
Posts (Atom)